Community licenses are for non-commercial, non-production use in an academic setting. You can find more information about licensing here .
This video shows how to register for a community license and install it on Windows. The process is basically the same on a Mac. If you prefer written instructions, keep reading below the video.
If you have not done so yet, signup for a free account at https://academic.gams.com using your institutional email address.
Download a GAMS installation file at https://gams.com/download/ for your operating system and install GAMS.
Make sure to update your name in the user portal, so it can be included in your license.
Go to the portal dashboard , click on the correct “get your free community license” button (either node or network), and then hit the orange “Generate License” button
You will then see your personal license in the Licenses section
Copy your Access Code into your clipboard
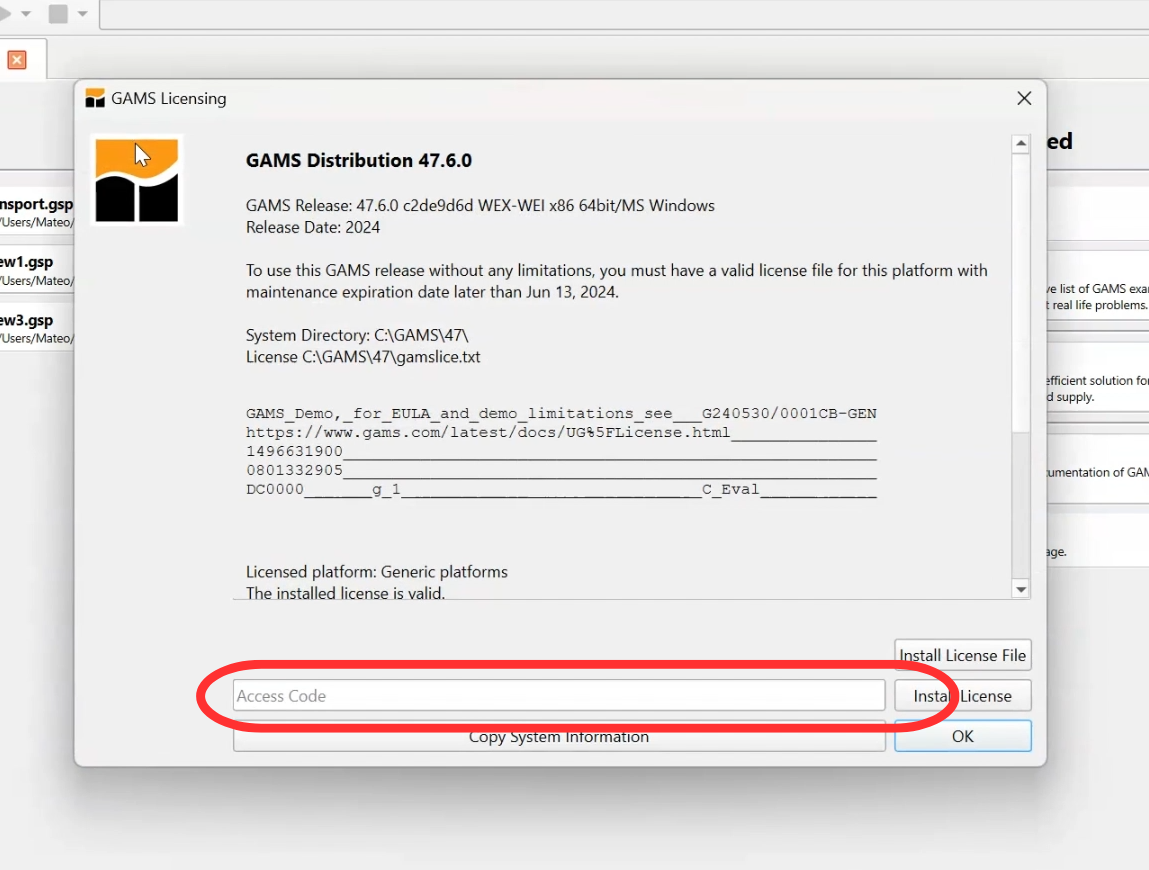
Start the GAMS Studio application on your laptop or PC, and inside the application go to HELP > GAMS Licensing.
Click on the white box that says “Access code” and paste your access code.
Click on “Install License”. A message will appear asking if you want to “create a license file based on the selected license”. Click “Yes”.
Your new Community License should be installed and visible. Click “Ok”. You are now ready to starting using GAMS Studio.