The following instructions refer exclusively to the installation and configuration of GAMS MIRO Server. The corresponding steps have to be performed on the server used for this purpose. Please make sure that you have installed GAMS Engine before proceeding with the installation of GAMS MIRO Server.
Server Setup
GAMS MIRO Server - Setup
Note:
To install MIRO Server, first download the ZIP file that contains everything you need to get started here.
The general installation instructions are given below. However, keep in mind that the installation is highly dependent on your setup. The setup of GAMS MIRO Server should typically be performed by a system administrator. If you have problems with the installation, please do not hesitate to contact us by mail at support@gams.com.
Note:
GAMS Engine is currently only supported on x86_64 Linux distributions that are supported by Docker!
- Install Docker from https://docs.docker.com/engine/install/. Start Docker afterwards. We further recommend to configure Docker to start on boot. To use the Docker CLI without sudo, you must add your user to the docker group.
- Install Docker Compose from https://docs.docker.com/compose/install/.
- Extract miro_server.zip. This will create a subfolder miro_server.
-
Open a terminal and cd into that folder.
Tip:
GAMS MIRO applications will later be stored at this location.
- In case MIRO Server and GAMS Engine run on the same machine: Get the IP of the docker0 network interface via: sudo ip addr show docker0 |grep -Po 'inet \K[\d.]+'. You will need this IP in the next step.
-
Install MIRO Sever by running ./miro-server install. You will be asked to enter the GAMS Engine host and the namespace to be used by MIRO Server.
-
If MIRO Server and GAMS Engine are running on the
same machine, enter for the host:
http://<IP extracted from previous
step>/<engine location>/api
. The Engine location is root/empty per
default. Note that the MIRO Server location is also
root/empty per default. Thus, you need to make sure
that there is no conflict between the two services
(i.e. one of them has a different location).
If you specified a port when installing GAMS Engine, this port must also be specified here: http://<IP extracted from previous step>:<engine port>/<engine location>/api. - If GAMS Engine is running on a separate machine, enter the URL here, e.g. http(s)://mydomain.com/api.
The default namespace is global. You can also specify any other namespace created in GAMS Engine. You can change the GAMS Engine connection info at any time by modifying the auto-generated .env file that is located inside the miro_server directory. The following environment variables have to be set:
Environment Variable Name Environment Variable Value Example GMS_MIRO_ENGINE_HOST IP adress and port/DNS of Engine https://mydomain.com/api GMS_MIRO_ENGINE_NS Engine namespace to be used by MIRO Server miro_server Note that MIRO Server must be restarted if the .env has been changed.
You will also be asked whether you want to use MIRO Server with or without authentication service, i.e. whether users have to log in with an existing GAMS Engine account (default) or whether everyone with the valid URL should have free access to the app(s). Read more about the user management here.
The installation script will inform you whether the installation was successful or not.
-
If MIRO Server and GAMS Engine are running on the
same machine, enter for the host:
http://<IP extracted from previous
step>/<engine location>/api
. The Engine location is root/empty per
default. Note that the MIRO Server location is also
root/empty per default. Thus, you need to make sure
that there is no conflict between the two services
(i.e. one of them has a different location).
Start / Stop / Update / Uninstall
Start
Once you have GAMS MIRO Server installed, you can launch it via
> ./miro-server start.
GAMS MIRO Server will now listen on port 8080 and the MIRO Server REST API on port 8081 . You can log in with any GAMS Engine user who either has some permission or can see models in the specified namespace. Users without permissions in the namespace can see a model if they can see a user group associated with that model.
To directly access a MIRO application that has been added to MIRO Server, go to /app_direct/<appId>, where appId is the lowercase name of your main gms file per default.
StopTo stop a running instance of GAMS MIRO Server, run
> ./miro-server stop
Restart
To perform a restart, run
> ./miro-server restart
Note that if you make changes to the docker-compose.yml file these changes are not reflected after running this command. In such a case do a ./miro-server stop and ./miro-server start.
UpdateTo update GAMS MIRO Server to the latest version, run
> ./miro-server update
Note that this will pull new images from Docker Hub and launch them. If you only want to pull new images, run
> ./miro-server pull
Backup (Linux only)
To backup GAMS MIRO Server, run
> ./miro-server backup
This creates a new ./backup directory in the current directory. A MIRO backup consists of two files: ./backup/dump_db_${BACKUP_TIME}.gz and ./backup/dump_miro_server_${BACKUP_TIME}.gz with a backup of the MIRO PostgreSQL database and the current directory respectively. BACKUP_TIME is a timestamp with the following format: %d-%m-%Y_%H_%M_%S.
Restore (Linux only)To restore GAMS MIRO Server from a backup created with the ./miro-server backup command, first unzip a new miro_server.zip and navigate to the miro_server directory. Next, copy the backup directory with your backup files into this directory and run
> ./miro-server restore BACKUP_TIME
where BACKUP_TIME is the backup timestamp in the form: %d-%m-%Y_%H_%M_%S (e.g. 01-04-2022_19_13_41 for April 1, 2022, 19:13:41).
UninstallTo remove GAMS MIRO Server including all data associated with it from your server, run
> ./miro-server uninstall
Additionally, you can remove the directory where you extracted the configuration files of the GAMS MIRO Server.
Customize MIRO Server
After setting up MIRO Server, some basic configurations can be made. This includes, among other things, setting a logo for the login screen or adjusting the authentication method.
Most of the settings can be done in the data/application.yml file in the miro_server directory. Note that you must stay with the file's YAML format. It is also important that no adjustments are made to the file other than the following settings. Changes directly affect the functionality of MIRO Server!
application.yml example
The following settings can be made in the data/application.yml file:
-
Title (proxy.title):
Sets the title that is visible in the browser tab. -
Color theme (proxy.theme):
For MIRO Server the same
color themes
are available as for MIRO Desktop:
- Default theme (YAML value: "default")
- Black and white ("blackandwhite")
- Green forest ("forest")
- Tawny ("tawny")
- Dark blue ("darkblue")
- Red wine ("redwine")
- Custom theme ("custom")*
This global color theme setting initially applies to all apps, the app overview page and the login screen. You can set a different color theme individually for each app, which overrides the global setting. Read more about the app environment here.
If you have created a custom theme for MIRO Server, place the downloaded colors_custom.css file in a newly created folder in miro_server/data, e.g. miro_server/data/css/colors_custom.css. Now specify this style sheet in the docker-compose.yml file under 'proxy.volumes':
  proxy:
    image: gams/miro-proxy:latest
    ports:
      - 8080:8080
    volumes:
+     - ./data/css/colors_custom.css:/home/miroproxy/templates/2col/assets/css/themes/colors_custom.css
      - ./data:/home/miroproxy/data
The path before the colon (./data/css/colors_custom.css) points to your custom theme CSS file. The second path points to the file inside the container that will be overwritten.
Note that in addition to the predefined and custom themes, you can also include a customized css file.
-
Language (proxy.miro-lang):
With this setting you can set the global language for all deployed MIRO apps. Currently, the languages available are English ('en'), Chinese ('cn') and German ('de'). This global language setting initially applies to all apps. You can still set a different language individually for each app, which overrides the global setting. This allows to host apps in different languages. Read more about how to change the language for an individual app.
-
Maximum file size when uploading (MB)
(proxy.max-upload-size):
The maximum size (in megabytes) that files (e.g. apps in admin panel or data in MIRO apps) may have when uploading.
-
Force apps to be signed
(proxy.force-signed-apps):
MIRO apps can be signed to guarantee the authenticity of the developer. This can protect you from accidentally importing apps that have been tampered with by a malicious actor. By default, MIRO Server imports all apps. No signature verification is enforced. To enable signature verification, set this option to: true. MIRO will then issue an error in case you try to import an app that is not signed by a trusted developer. You should store all public keys (in PEM format) of the developers you trust in the directory: miro_server/data/known_keys.
-
Disable readonly mode
(proxy.disable-readonly-mode):
By default, when a user without permissions on the MIRO Server namespace opens an application, MIRO starts in read-only mode. This means that the GAMS interaction section and the "Solve" button are hidden. In addition, the sandbox scenario cannot be saved or deleted. To disable this behaviour, set this option to: true.
-
Anonymous readonly mode
(proxy.anonymous-readonly-mode):
Only relevant when authentication is disabled (proxy.authentication: none): Activates read-only mode (GAMS interaction section and solve button hidden and sandbox scenario cannot be saved/deleted). It is recommended not to give the anonymous user any permissions in GAMS Engine if this setting is enabled.
-
Authentication method
(proxy.authentication):
When you set up MIRO Server as a server administrator, you can choose to use the service with or without authentication. This decides whether anyone with access to the MIRO Server URL is allowed to access the MIRO apps, or whether GAMS Engine credentials are used. In the data/application.yml file you can change this setting. The following options are available:- proxy.authentication: webservice: GAMS Engine authentication
- proxy.authentication: openid: OpenID Connect authentication
- proxy.authentication: none: No authentication
-
Context-path
(server.servlet.context-path):
If you want to host MIRO Server on a different path than root, you must adjust the context path under server.servlet.context-path. For example, if you want to access the MIRO apps at https://mydomain.com/miroapps, then the context-path must be set to /miroapps. Beside the adjustment of the path in the application.yml file, the configuration of the reverse proxy (Nginx: location property) has to be adjusted as well. Note that this has no effect on the MIRO Server REST API. To also change the root path of the REST API, you must specify the root path via the SCRIPT_NAME environment variable in the docker-compose.yml file:
When running MIRO Server without authentication, models can only be solved/submitted to GAMS Engine if a user with execute permissions is used. The credentials of this user must be provided in the .env file in the miro_server directory. More about this here.
To set up OpenID Connect for authentication, a few additional parameters need to be set. Read here for more information.
  auth:
    image: miro-auth
    build: ./auth/
    ports:
      - 8081:1234
    environment:
+     SCRIPT_NAME: /miroapps
      PORT: 1234
- Lax: (recommended) provides protection against CSRF attacks
- Strict: provides protection against CSRF attacks. However, note that this will block cookies when a user clicks on a link to MIRO Server. For example, assume the user is logged-in to MIRO Server on https://miro-server.local and there is a link to https://miro-server.local on your intranet at https://myintranet.local. When the user clicks on this link, they will not be logged-in. Therefore we do not recommended this option, without being aware of the consequences.
Whether to set Secure flag on all cookies (true) or not (false). Highly recommended when using HTTPS.
- disable: do not set the header (i.e. allow embedded MIRO Server in any website)
- allow-from: whitelist domains that allows embedding MIRO Server (e.g. frame-options: allow-from https://example.com)
- sameorigin: (recommended) allow framing if parent and child have same origin
Other settings:
-
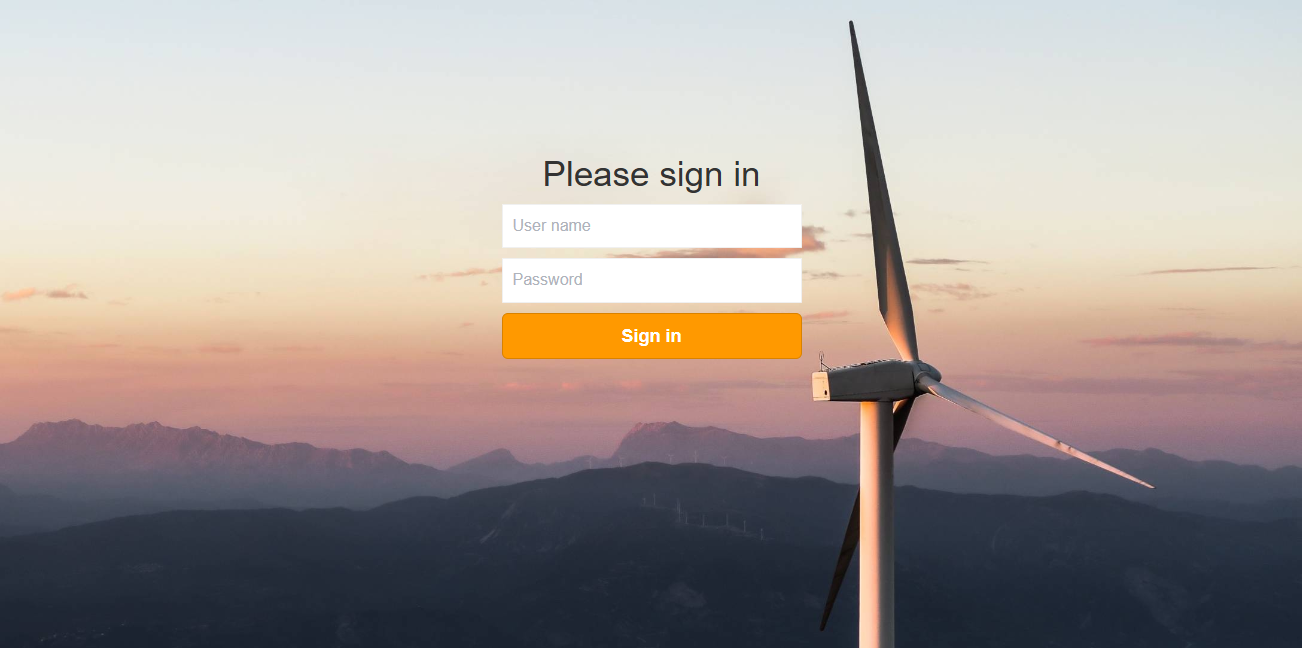
Logo:
In addition to the settings in the application.yml, the logo that is displayed in the login screen can also be customized. To change the logo, replace the logo.png under data/img/ in the miro_server directory. -
Custom styles:
The CSS styles of MIRO Server can be customized. For example, you can re-design the login page or apply other custom styles to the login and app overview screen:
For this purpose, a custom CSS file must be provided when MIRO Server is started. To do this, create a new directory 'CSS' under miro_server/data, where you put the custom CSS (e.g. miro_server/data/css/styles.css). Now specify this style sheet in the docker-compose.yml file under 'proxy.volumes':
  proxy:
    image: gams/miro-proxy:latest
    ports:
      - 8080:8080
    volumes:
+     - ./data/css/styles.css:/home/miroproxy/templates/2col/assets/css/styles.css
      - ./data:/home/miroproxy/data
The path before the colon (./data/css/styles.css) points to your custom CSS file. The second path points to the file inside the container that will be overwritten.
The original stylesheet used by MIRO Server can be found here.
Note:- Future MIRO Server releases may change the underlying HTML (for example, we might add, remove, or rename CSS classes). If you maintain custom stylesheets, always test them on a staging or test server before upgrading to be sure they still render as expected.
- Note that the styles only affect MIRO server components and not the MIRO applications themselves!
All changes will take effect after a restart of MIRO Server. If you make changes to the docker-compose.yml configuration you need to do a ./miro-server stop and ./miro-server start.
Authentication: OpenID Connect
GAMS MIRO Server supports OpenID Connect as an authentication method. To use OpenID Connect, the proxy.authentication key (in the data/application.yml file) needs to be set to openid. In addition, the following parameters need to be specified:
-
Auth Endpoint URL (proxy.openid.auth-url):
The URL where OIDC initiates authentication flows. GAMS MIRO Server will redirect here when an unauthenticated user accesses a page. -
Token Endpoint URL
(proxy.openid.token-url):
The URL where tokens can be retrieved. -
JSON Web Key Set (jwks) URL
(proxy.openid.jwks-url):
The URL where the public certificates of your identity provider can be found. -
Logout URL (proxy.openid.logout-url,
optional):
URL to be used for logging out of the OpenId session of your identity provider. Omitting this option will simply clear the session of the user (without terminating it at IDP). -
Client ID (proxy.openid.client-id):
A unique ID generated by your identity provider for GAMS MIRO Server. -
Client Secret
(proxy.openid.client-secret):
A secret generated by your identity provider for GAMS MIRO Server. -
Use PKCE (proxy.openid.with-pkce,
optional):
Whether to use Proof Key for Code Exchange (PKCE) (default: false).
An example for Google can be found below:
proxy:
  [...]
  authentication: openid
  openid:
    auth-url: https://accounts.google.com/o/oauth2/v2/auth
    token-url: https://oauth2.googleapis.com/token
    jwks-url: https://www.googleapis.com/oauth2/v3/certs
    logout-url: https://www.google.com/accounts/Logout?continue=https://appengine.google.com/_ah/logout?continue=http%3A%2F%2Fwww.yourmiroerver.com%2Flogout-success
    client-id: ***
    client-secret: ***
Do not forget to replace www.yourmiroerver.com in the logout-url field with the URL of your MIRO Server instance.
Similarly, an example for Microsoft Entra ID:
proxy:
  [...]
  authentication: openid
  openid:
    auth-url: https://login.microsoftonline.com/<your-tenant-id>/oauth2/v2.0/authorize
    token-url: https://login.microsoftonline.com/<your-tenant-id>/oauth2/v2.0/token
    jwks-url: https://login.microsoftonline.com/<your-tenant-id>/discovery/v2.0/keys
    logout-url: https://login.microsoftonline.com/common/oauth2/v2.0/logout?post_logout_redirect_uri=http%3A%2F%2Fwww.yourmiroserver.com%2Flogout-success
    client-id: ***
    client-secret: ***
In addition, the GAMS Engine server must be configured to use the same OpenID Connect provider, and all users who wish to log into MIRO Server must also use this identity provider. Note that the Client ID you specified in the MIRO Server configuration must be added to the list of additional client IDs (extra_client_ids) of GAMS Engine.
Note:
In your OpenID Connect provider, you need to register the following redirect URI: http(s)://www.yourmiroserver.com/login/oauth2/code/miroserver.
Extending the MIRO Docker image
In case your MIRO applications need additional packages, you have to extend the MIRO UI Docker image. You can do so by adding the additional packages required by your custom renderers to the file additional_packages located inside the miro_server directory. Each package name must be on a new line. Once all packages are added to this file, run
> ./miro-server build
Please note that additional packages may cause version conflicts with packages used internally by MIRO. We therefore recommend keeping the number of additional packages to a minimum.
Nginx example configuration
We suggest to run GAMS MIRO Server behind a reverse proxy such as nginx. You can find an example configuration in the file miro.conf located inside the miro_server directory mentioned in the installation instructions. To apply this configuration, simply copy it to the configuration location of your nginx (e.g. sudo cp miro.conf /etc/nginx/conf.d/). Note that you will have to reload nginx afterwards using sudo nginx -s reload.
Hosting GAMS Engine and MIRO Server on the same hostWhen you are hosting MIRO Engie and MIRO Server on the same host, you have to merge the nginx configurations of both GAMS Engine and MIRO Server. A resulting /etc/nginx/conf.d/miro.conf could look as follows:
Nginx example configuration
Note that even though both GAMS Engine and MIRO Server run on the same host, the GAMS Engine host is not localhost. In case TLS, port/certificate info etc. is used, this needs to be added here as well. If you need help with this, please contact us. Nginx needs to be reloaded if the configuration has been changed: sudo nginx -s reload.
If you want to host MIRO Server on a path other than root, you must change the context path in the file data/application.yml accordingly (entry server.servlet.context-path).
Running under SELinux
Note that with SELinux active (e.g. CentOS/RHEL), you might have to allow your nginx server to proxy to the upstream MIRO Server host. You can do so by running: setsebool -P httpd_can_network_connect 1.
Example: Install MIRO Server and GAMS Engine on the same machine
If the Engine One instance is running on the same machine as MIRO Server, there are a few things to consider. The following example shows the installation procedure to run MIRO and Engine on a freshly installed Ubuntu 24.04 server.
Planned configuration
- Access MIRO Apps under https://my-miro.com/
- Access GAMS Engine under https://my-miro.com/engine/
1) Prerequisites
- Install and start Docker.
- We recommend configuring Docker to start on boot and to manage docker as a non-root user.
- Install a reverse proxy, e.g. Nginx.
- For the installation of MIRO Server and GAMS Engine you need a tool to unzip archives, e.g. unzip: sudo apt install unzip.
2) Install GAMS Engine
Since the MIRO Server setup requires the GAMS Engine location to be specified, it must be installed first.
- Download the GAMS Engine zip file and put it e.g. into the home directory under /home/ubuntu.
- Unzip the archive and cd into the gams_engine directory.
- Run the script ./up.sh e.g. ./up.sh -a test1234 -m engine -p 8095 -w 4.
- -a test1234: Default password for Engine admin user.
- -m engine: By default, GAMS Engine is mounted under /. Since we want to access it under https://my-miro.com/engine/, we need to specify this here.
- -p 8095: We specify an Engine port to be used in a Nginx configuration. Port 8081 is reserved by MIRO Server, which we have to take into account because MIRO Server is supposed to run on the same machine.
- -w 4: 4 GAMS workers for solving incoming jobs.
- Note that no certificate files were specified in this step. These will be configured in the Nginx configuration later.
3) Install GAMS MIRO Server
- Download the MIRO Server zip file and put it e.g. into the home directory under /home/ubuntu.
- Unzip the archive and cd into the miro_server directory.
- Get the IP of the docker0 network interface via: sudo ip addr show docker0 |grep -Po 'inet \K[\d.]+'.
- Run ./miro-server install.
- Host: http://172.17.0.1:8095/engine/api.
- Namespace: global. This is the default Engine namespace. If GAMS Engine is to be used by other clients as MIRO Server, we recommend using a different namespace.
- Use MIRO Server with authentication service: Yes.
- Run ./miro-server start.
4) Configure Nginx
We configure Nginx to forward the root URL https://my-miro.com/ to MIRO Server and https://my-miro.com/engine to GAMS Engine. Depending on the Linux distribution used, it differs where and how the configuration should be stored. In this example we use Ubuntu 20.04.
- Add a Nginx configuration file, e.g. miro.conf under /etc/nginx/sites-available. We use the Nginx example configuration as a starting point.
- Specify certificate files. In the example configuration these are commented out.
- Under location /engine we specify the Engine port by replacing proxy_pass http://127.0.0.1:5000 with proxy_pass http://127.0.0.1:8095.
- Ubuntu-only: Run sudo ln -sf /etc/nginx/sites-available/miro.conf default to replace the default configuration.
- Run sudo nginx -s reload.
Example: Install multiple MIRO Server instances on the same machine
Besides running Engine and MIRO Server on the same machine it is also possible to have multiple MIRO Server instances running there. This could be useful, for example, if some MIRO applications should be showcased, while others should only be accessible to registered users. The following example builds on the previous configuration and adds another MIRO Server instance. This should be accessible under https://my-miro.com/server_2/.
Install a second MIRO Server instance
- Under /home/ubuntu create a directory, e.g. miro_server_2.
- Unzip the MIRO Server archive into that new folder. Make sure that the files are directly located in miro_server_2 (e.g. /home/ubuntu/miro_server_2/docker-compose.yml) and not further nested in a miro_server folder.
- cd into miro_server_2.
- In the docker-compose.yml file, the default ports used by some MIRO services need to be changed to avoid conflicts with the first MIRO Server instance.
- Change services.auth.ports from 8081:1234 to e.g. 8096:1234
- Change services.proxy.ports from 8080:8080 to e.g. 8090:8090
- In data_raw/application.yml:
- Change proxy.port from 8080 to 8090 (same port as in services.proxy.ports in the docker-compose.yml)
- Change server.servlet.context-path from / to /server_2. the context-path specifies under which URL MIRO Server should be accessible. By specifying /server_2 the second MIRO Server instance will be accessible under https://my-miro.com/server_2/.
- Run ./miro-server install
- Host: http://172.17.0.1:8095/engine/api.
- Namespace: server_2. We use a different namespace for each MIRO Server instance. This namespcae must be created in Engine before.
- Use MIRO Server with authentication service: Yes.
-
In the Nginx configuration we now specify the location
of the second MIRO server instance incl. REST API.
Nginx configuration to add
    location /server_2 {
        proxy_pass http://127.0.0.1:8090;

        proxy_http_version 1.1;
        proxy_set_header Upgrade $http_upgrade;
        proxy_set_header Connection "upgrade";
        proxy_read_timeout 600s;

        proxy_redirect    off;
        proxy_set_header  Host             $http_host;
        proxy_set_header  X-Real-IP        $remote_addr;
        proxy_set_header  X-Forwarded-For  $proxy_add_x_forwarded_for;
        proxy_set_header  X-Forwarded-Proto $scheme;
    }
    location /server_2/api/ {
        proxy_pass http://127.0.0.1:8096;

        proxy_redirect    off;
        proxy_set_header  Host             $http_host;
        proxy_set_header  X-Real-IP        $remote_addr;
        proxy_set_header  X-Forwarded-For  $proxy_add_x_forwarded_for;
        proxy_set_header  X-Forwarded-Proto $scheme;
    }
Requests for /server_2 are passed to port 8090 which we also specified in the docker-compose.yml and the data_raw/application.yml file. The MIRO REST API can be accessed via /server_2/api. The port corresponds to the one used in docker-compose.yml.
- Reload Nginx via sudo nginx -s reload.